

 1073
1073
Access
The login screen is where you create an account and sign in. You only need to enter your full name, an email, and a password. To start, access the link provided in your email and log in with your account details. If it is the first time, you will receive a temporary password from your admin. To do this, access the link in your email and log in with your account details.
After that, the landing page corresponds to the Design Module, with a list of the recent designs, sequences, and DNA Assembly reports.
Top Menu

On the Upper Menu of the Design Module, you can see the project you are currently working on and change between projects. Next, an Explorer Menu to have access to the libraries, where a list of all the used biological information is stored. Last, on the right side of the Upper Menu, you can see your notifications, change between dark and light mode, use the search tool, and go to User Settings.
Libraries
When accessing a library from the Top Menu, you get this typical library view:
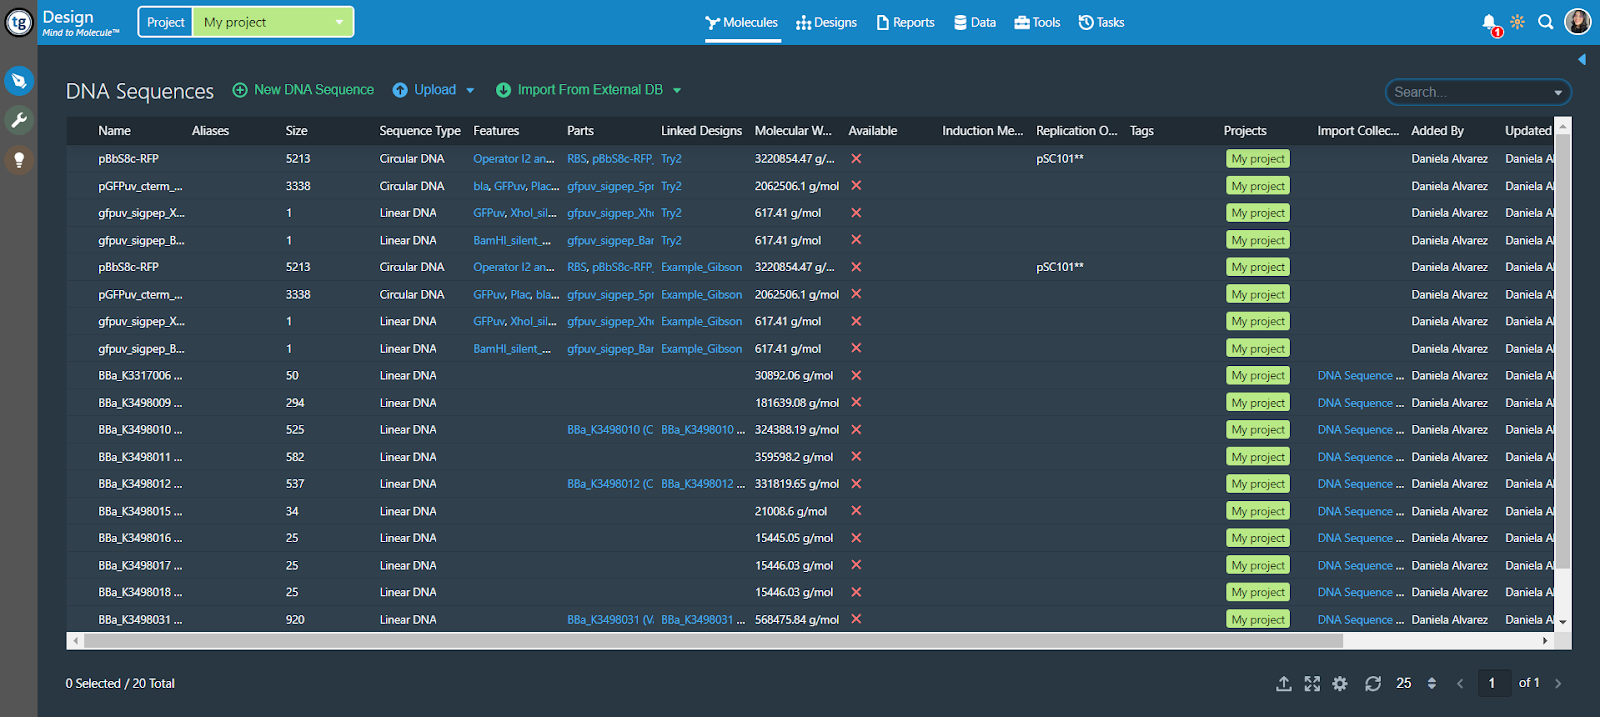
On the upper part, you can see the name of the library, options to add new data to it (either from scratch or in bulk by uploading a document), and a search tool. In a library, you will see different information about each item, and you have options to edit or open them to see more details. On the bottom part, you have information about the number of items, and options to export.
Importing data
The easiest way to import any type of data is to go to the corresponding library, locate the “New” icon on the upper part, and fill in the required information. However, if you prefer to import data in bulk, you can upload files in FASTA or CSV formats.
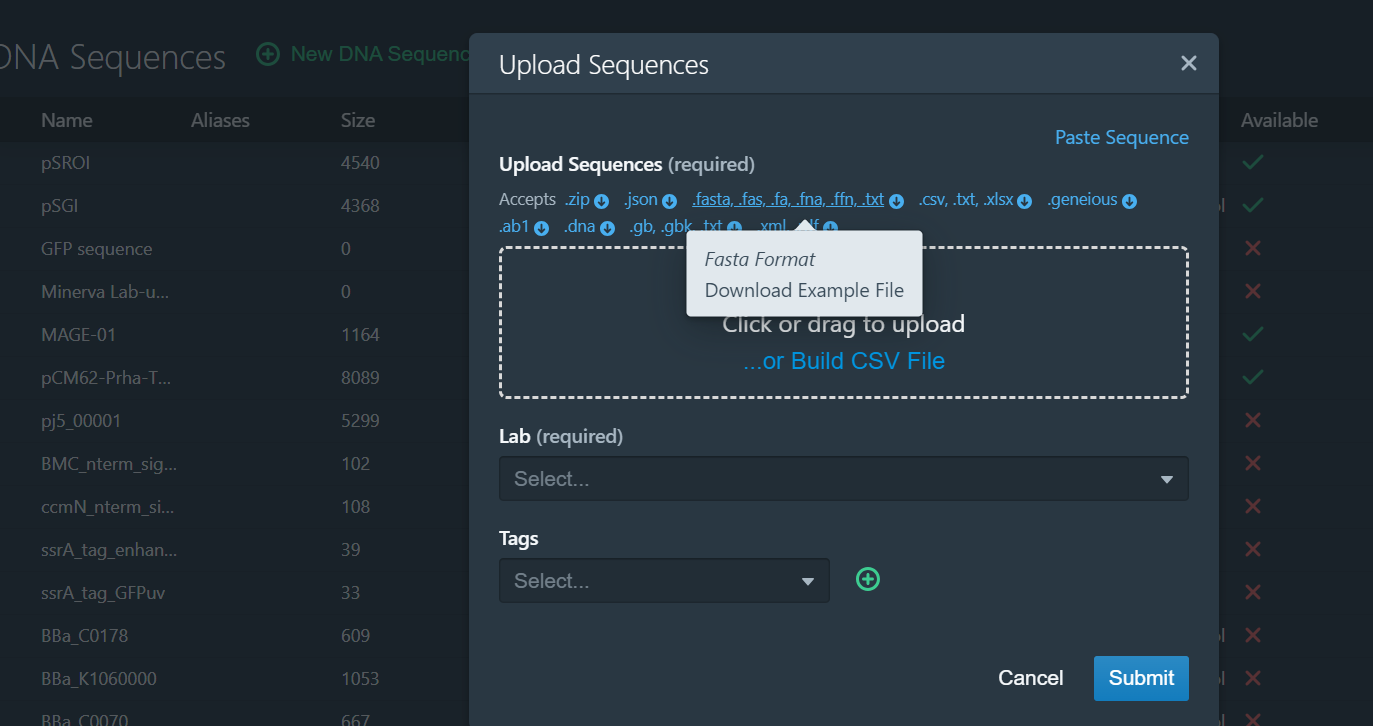
Notice that each library has its own file format. Make sure to add all the required information by following the file templates (available when clicking on a specific format on the window displayed to upload files).
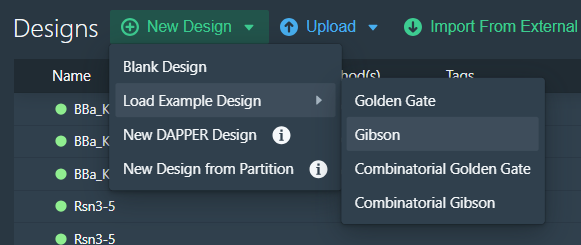
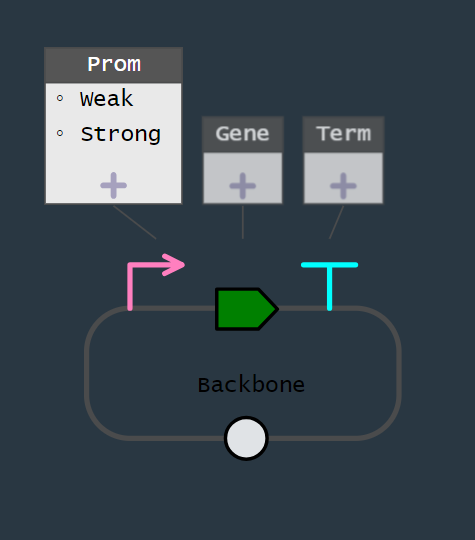
Designs and Schematics
To work with designs, you can create them from scratch or start with the available example designs (both options can be found in the Designs library). Example Designs allow you to select the Assembly Method (Golden Gate or Gibson Assembly).
The window shown will show you a table-like view, with SBOL icons representing DNA Parts in each column and the names of those parts in the rows below. Notice that you can add as many columns or rows as you need. To work with combinatorial designs, add more than one part in a single column; this will be taken into consideration when generating your Assembly reports.

Click on the parts of a design to see or edit their details on a side panel, or double-click to open them on a separate window. Notice that there is a right menu on your screen, shown as a blue right panel with icons; this menu allows you to see your design details, assembly reports, assembly reaction details, card details, construct parts, bin details, part details, junction details, design comments, and reviews. Every Design can be used to create a Schematic, or you can directly create a schematic from scratch and convert it into a Design.
Auto Annotations
When working with designs, it is possible to automatically add annotation or Auto Annotate DNA in Bulk. To do this, you must go to the Sequence Features library. These features are visible on the sequence and plasmid maps of a DNA sequence or part and are automatically located and shown if you register them as canonical features. Features can be added, like any other data on a library, by creating them from scratch or uploading a file.
Reports
To create a J5 Assembly Report from a Design, click on the “Submit for Assembly” button on the upper right corner of the screen. This will start the J5 Run; you can track the status of it by checking your notifications (you will also receive an email when the report is complete). The time it takes to complete the Report will depend on the complexity of your design.
A typical report includes information about:
- Prebuilt Constructs
- Assembled Constructs
- Input Sequences
- Input Parts
- Assembly Oligos
- Annealed Oligos
- Digest Linearized Fragments
- Synthon Sequences
- PCRs
- Assembly Pieces
- Assemblies

